Sunday 30 November 2014

ok, so that didn't work out as I'd planned

so, partial mojo renewed at least... however the wonders of Norovirus and then my PC crapping out on me have not helped. So, despite pissing out of my arse for a week, having no PC for even longer and then loading a new operating system (and every little program or plug in you needed - seriously, never had that happen before, bloody Linux, back to Windows for me...), I still haven't been back on form modelling wise, partly a rediscovered love of boardgames is to blame, but also mainly Borderlands 2... but, I have been doing stuff (besides trying to remember every reference photo or pdf or link I lost in the crash), so viola:


just a tease for now, as the inside is trying something new (which looks great, but I want a big reveal)... ok, so another building, literally another Old Timber Frame Cottage from 4ground, but I've tried to vary it a little bit - hence the shift of the overhang being all at the front and, if you're sharp eyed enough, the ground floor is a little taller - so it doesn't look too identical to the other one. This one will have a tiled roof, so should be sufficiently different when finished. The chimney is bluefoam with random bricks etched in and then toughened up with liquid g/s. Splits in the chimney for the floors are similar to the big chimney in the Manor House, but I'll do close ups of those another time.

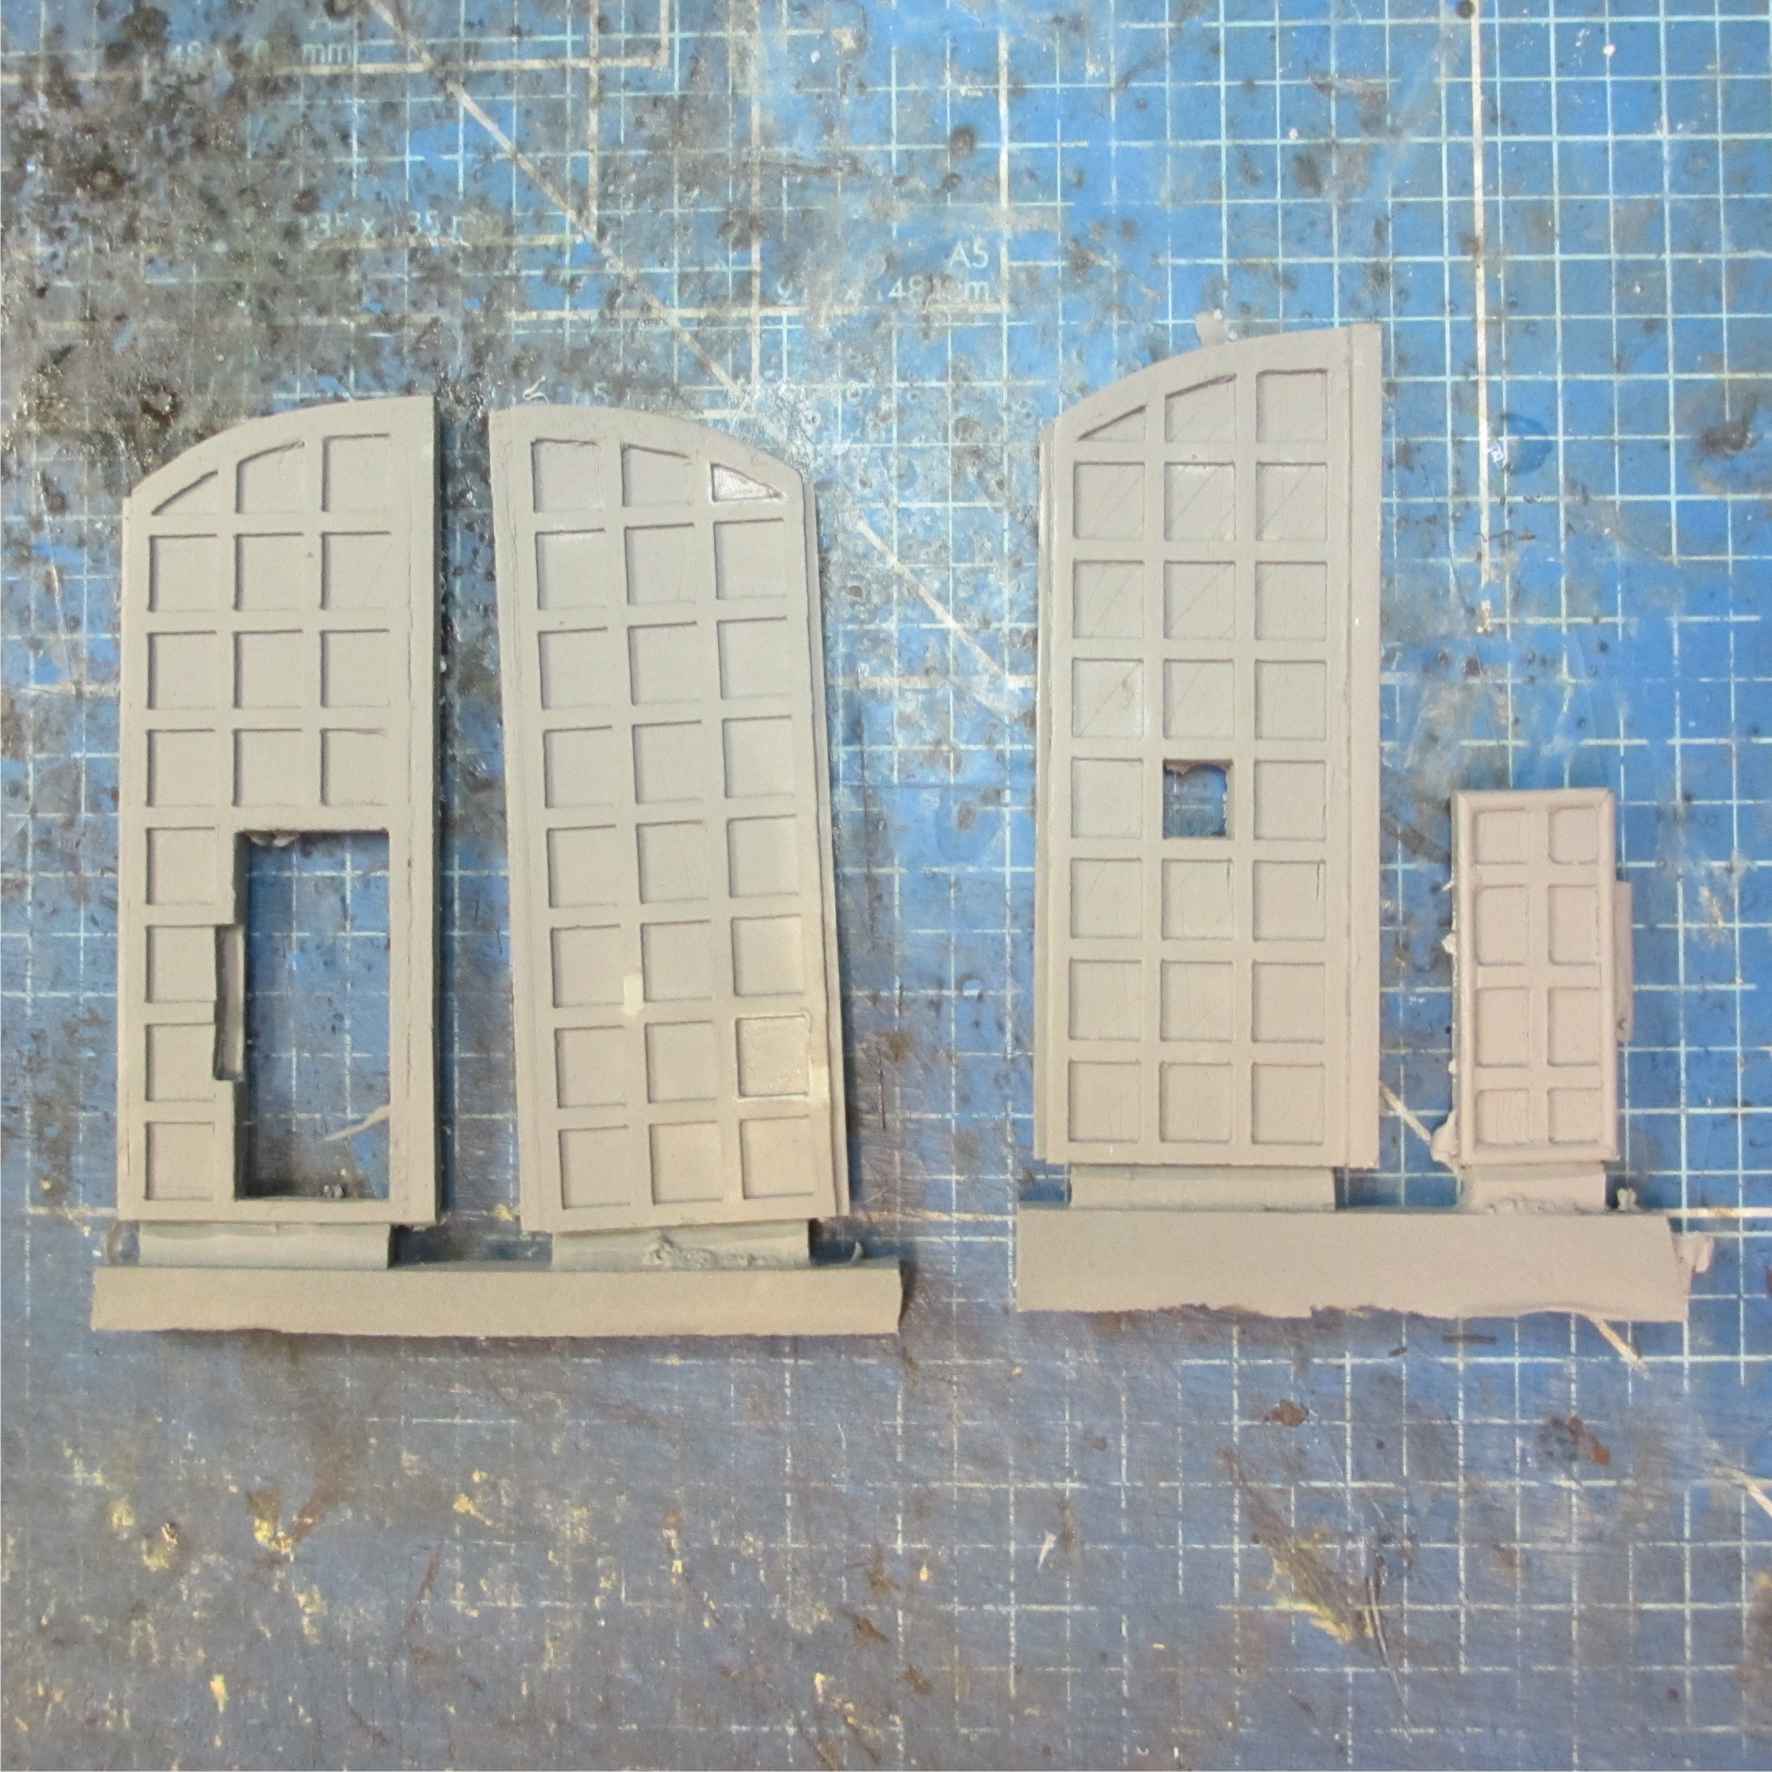
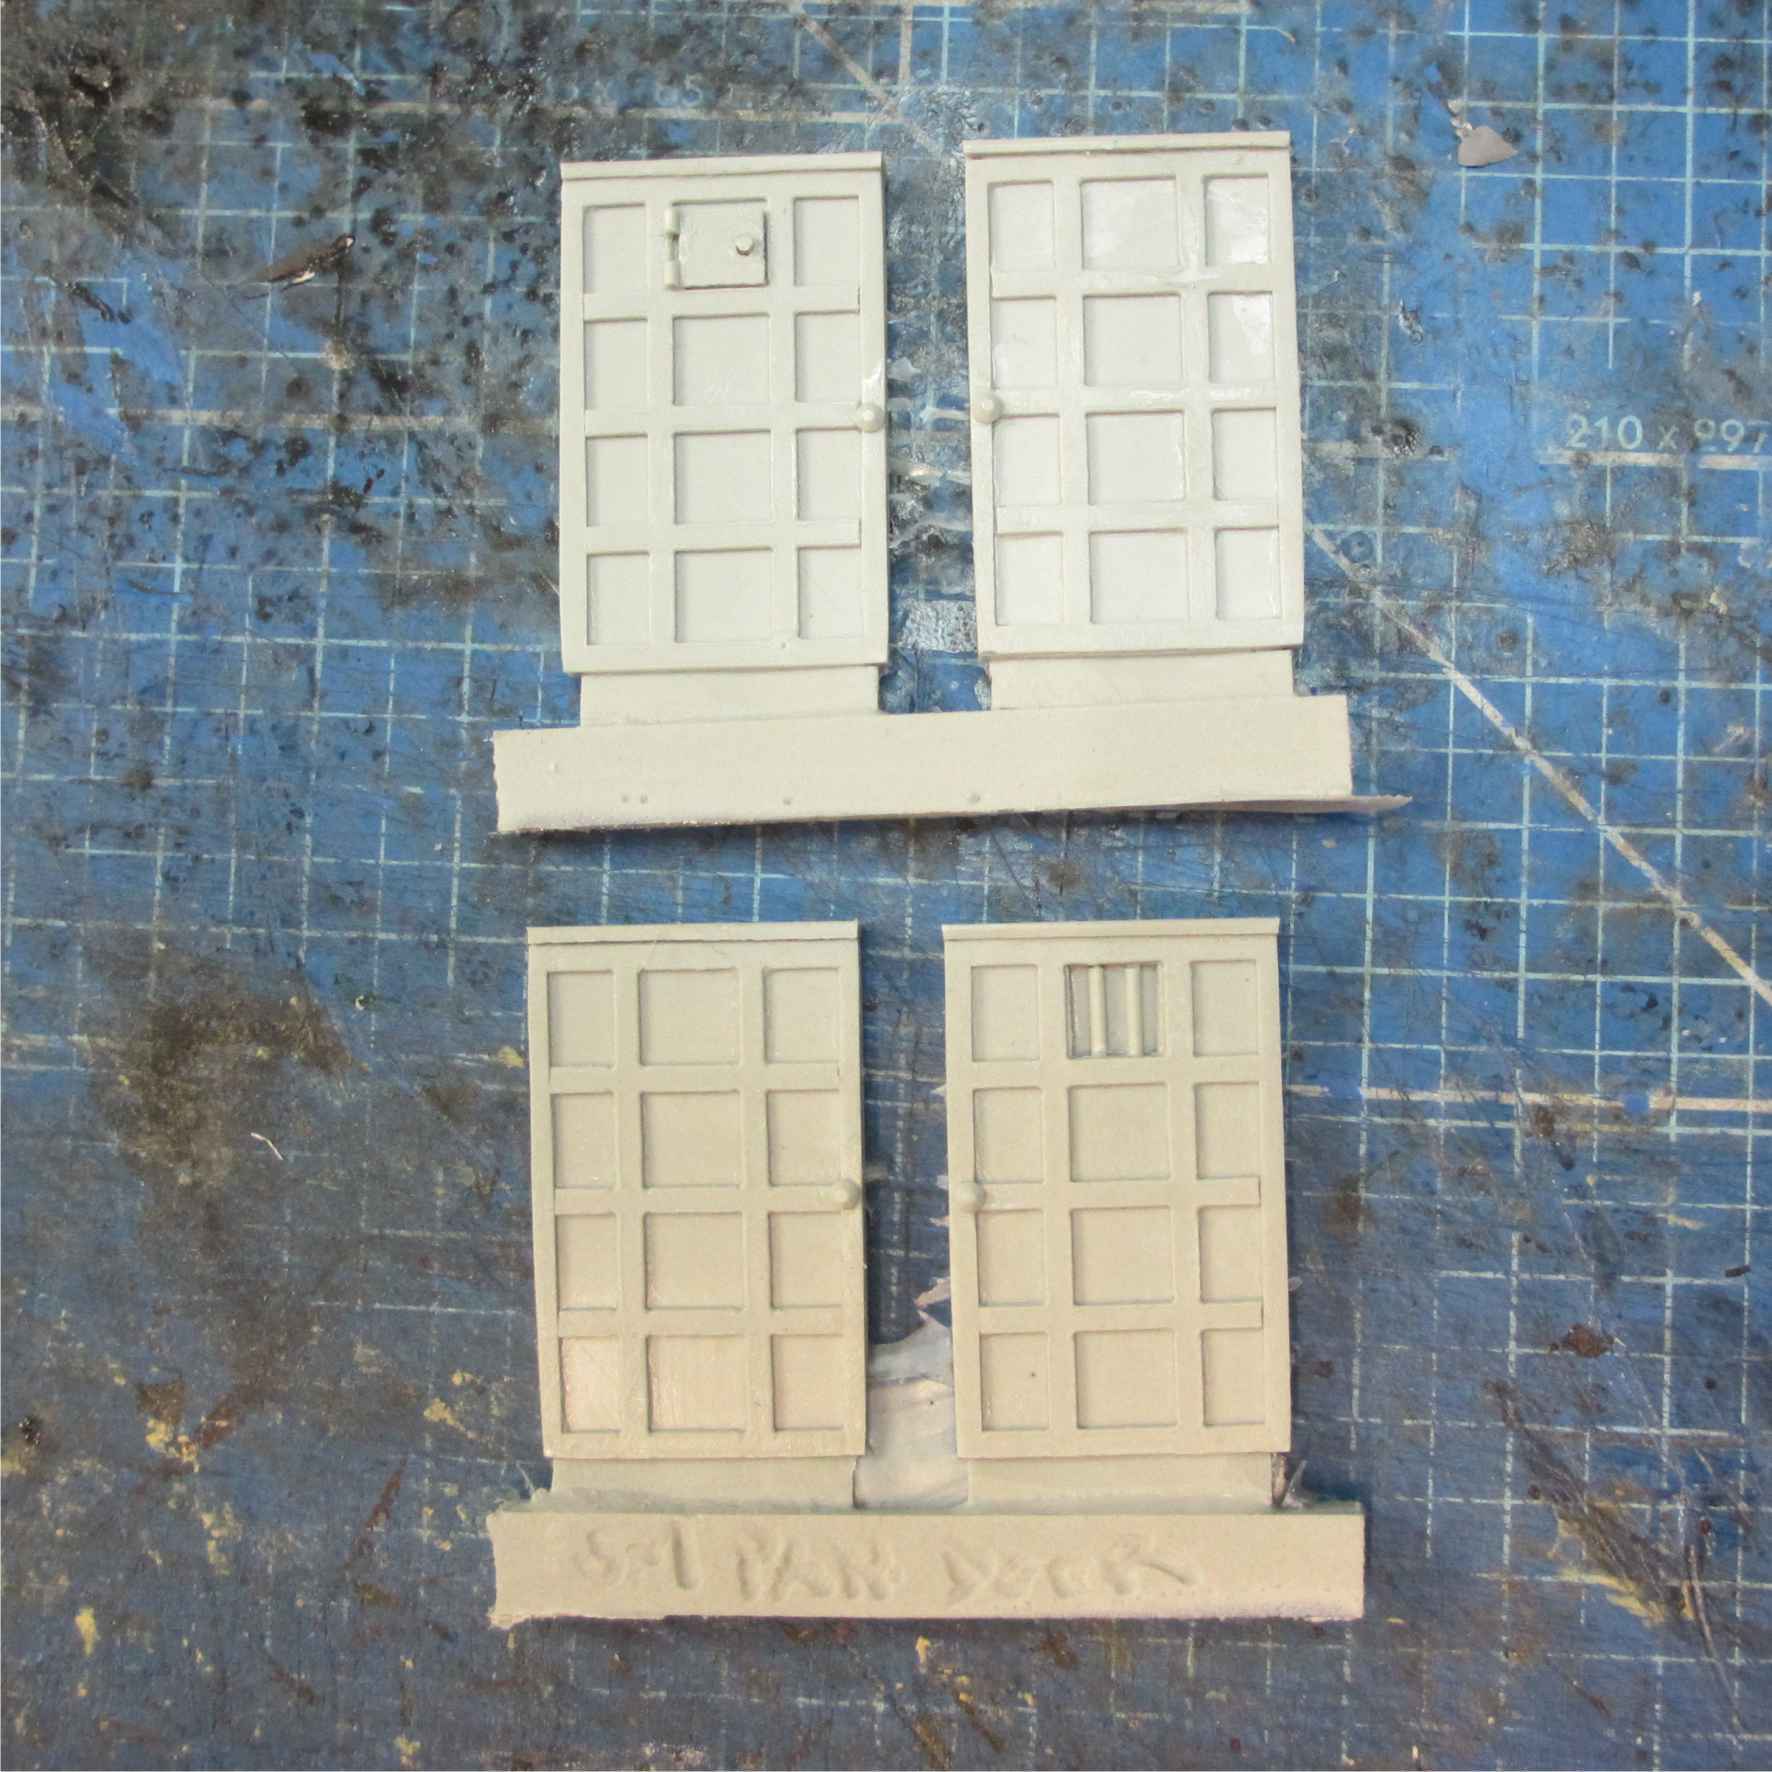
Now the overhang was originally going to take the wonderful Gothic Corbels from Antenociti, but I simply cannot find the damn things, I've looked everywhere and I know I had some somewhere... I would buy some more (£2 for 6), but postage would be £4 - I may yet cave in, as that overhang needs something to offset it and I'm now commited. Another building will be worked on next and then hopefully both will be painted together (with the Manor House, if I can decide how to finish the Gate House upper floor), but will need windows, lots and lots of windows...

EDIT: finally found the Corbels - which was a double result as they were in the same bag as the GW Green Man wall sconces, which would have been annoying if I'd realised that...

Wednesday 24 September 2014

and I'm back...

OK, after a period of mojo recovery, I've been busy - sadly some of that was a build up, review, tear down kind of busy, but the corrections (note the plural there) were worthwhile.
 

The bridge slots on nicely and will lead to something I haven't come up with yet, I've decided not to use the hexagonal platforms on the corners as they look odd with the rear bits built up, so I've done a simple platform for security, am still working on ideas for the other corner.


I wanted an open area down into the engineeringy section, but that took a couple of attempts until I got something I liked. Even then, it didn't quite work, so I raised it slightly to give the joining bridge more clearance. That was too tall to join with the far build as I planned, so that got lowered. I plan that part to be quite tall, but haven't the foampvc at the moment to complete the walls. I dread to think how much got used on false starts to get cut off again.

Anyway, I didn't take a photo of the interior of the far build, but a recessed door has been built - I'm trying to take a leaf from BBC set design with the doors and split level floors. The recess should also give Vila some cover while he picks the lock. 


Quite a successful change has been the doors - I stumbled upon some hobby sheet aluminium, with a few scores from a scalpel, it's snapped to size and sanded down - it's quite rigid and has a nice finish, although I initially thought metal would be handy as a material if the paint should get worn off from use, it's kind of works as it is.


And that's about it really - am kind of stalled as I need some stairs in order to really advance the builds at this point, but that is in hand.

Wednesday 9 July 2014

blather

firstly, I have a smart phone - and I'm still finding my way around the damn thing - however, it does appear to be smart enough to automatically include pics in my blog in my gallery and I miss my old wallpapers... so stay with me...


ahem - ok, progress on other things has been really slow, I had some time off work and really intended to get some figures painted, but my mojo has done a Burton and I'm stuck... suspect I will get back to the old toy thing as that is pushing me a bit more, but I am painfully aware of how long it's been since I actually painted anything and am getting a bit worried I might not get back in the swing of things... bloody mojo...

Wednesday 4 June 2014

old toy new life WIP part 2

well, technically part 2 at any rate, it just needed a catchier title...

Ok, the rooms within the base unit are done, walls thickened up slightly, some card down to hide various out of scale bits removed. All of the walls are at a slight angle, which makes things less boring, but means I have to get the doorways just right - and have just about managed it I think. Computer banks from Ainsty, which fit in quite nicely, the remaining corner will have swappable units I think, so it can vary what research/experiments might be going on...


The other room has had walls raised slightly to match the first room (and extended some of the exterior detail as well to cover the new wall), and again a door added. Again, the slant on the walls makes things tricky and this entrance had less available wall space to play with, so to make the removable door ended up with some very narrow strips of card to allow for the running grove - both doors should be the same size, but this one is a little tighter so has been sanded down on the edges a bit...


Much liquid g/s has helped hide any joins and blend stuff in. So far this is working quite well...

Thursday 29 May 2014

panelled gates and doors

the doors and gates I've done for my Manor House build are now available for sale from Fenris Games. Click on the pictures if you have a use for them:

http://www.fenrisgames.com/shop.html#!/~/product/id=36946457


http://www.fenrisgames.com/shop.html#!/~/product/id=36946456


Wednesday 28 May 2014

Action Force Tactical Battle Platform

 I picked this old Action Force playset up ages ago for about £8 if memory serves...


- it wasn't complete, the flip out platform was missing, as was the gun rack, but that was fine, as I originally intended to use it as an oil rig... but that has become too specific and the name of the game now is as much use as possible, so taking it down to the base platform gives a very interesting start to a 28mm terrain piece. There are some really great and crisp details and textures and I now see this as a good generic bit of sci-fi terrain for Dredd, Who, Blakes 7 and Action Force - it should work as a research centre, a pumping station, anything science based really (the legs will be used elsewhere I think)...


As you can see, I've removed the recessed vehicle pit and put in a platform - this helps give more area for 28mm figures and means they can cross from left to right without going down into the pit - my initial thought here was to reset the pit so it stuck out and to build more platform around it, however that would make it too big for storage so currently a wide flight of steps will go in the remaining hole. The filler platform has some plating etched into it and some random plates will be added elsewhere to help blend it in. The trench that runs along the back of the platform (joining the armoury with the control room) just happens to be perfect (with plenty of room) for 25mm slottas, so that was always staying, but in what form was a big question - originally I planned access down into the old armoury, and then along at the back to the old control room, but I suddenly decided to fill that blank space between two nicely molded gubbins, and cut down to add some steps there, and so far it looks pretty good I think.


The armoury (on the left) will now become a computer room, as 4 Ainsty computer panels fit nicely over where the rifle rack was. A door will be added to the bottom wall, but am undecided on whether to have a room above this. The control room (on the right, complete with attachment for a action figure sized chair) will become a machine room/engineering, with more hands on gubbins. The chair stalk will be kept I think and a door will be added blocking off the trench/corridor. Now the old control room had a black piece that fitted on for various consoles and this will make the basis of a next floor room, more machinery to monitor whatever is going on downstairs. Even better, on top of that fitted a clear plastic piece that form a lovely angled window on two sides and screams Spy-Fi villains office (but that is down the way a bit), so from that one area, I can easily make a 3 storey structure within the complex itself... plus I still have the hexagonal platforms and the helipad which scale much better to 28mm figures anyway...

Needless to say, this is going to take a while, the plastic is really hard to cut, but should make an interesting diversion...

Monday 12 May 2014

Imperial Landing Craft

Still plodding away at otherstuff as and when the moods strike (even dug the Quarry out a couple of weeks ago), and been taking advantage of some good prices on eBay in order to get some more ships for my Star Wars fighter scale stuff...


The Titanium Imperial Landing Craft fits in just about at that rough fit scale I want - it is better with the Titanium Falcon, as it should be slightly longer than the Falcon, but my attempts at tarting that up haven't really led anywhere, and the D'Agostini was always the nicer model...

In the background is a play around with the Micro Machine TIE Bomber - I did find a forum somewhere that went into great detail about the TIE Shuttle briefly seen in Empire Strikes Back, and with a lot of convincing evidence about the flipped wings. Annoyingly, I didn't bookmark it. Anyhoo, I had two MM bombers, so used the cockpit module from each one (never understood why the shuttle wouldn't have a window for the passenger module) and flipped the wings. It looks ok, but may not get much further - I have the D'Agostini Imperial Shuttle which is a good scale match (although guns need repairing after the really heavy paintjob was stripped).

Saturday 19 April 2014

wood for the trees and other vistas


ok, excuse the poor photos (colours really aren't being done credit), but have finally got stuff to stick to the sodding trees... it looks much more blended in real life, but job done (finally). The big trees sadly just didn't work, tried and tried to get them looking as I intended and just couldn't - so chopped them down and used the bases for thickets (as I was very happy with the bases), these are a good solid line of sight blocker, and will be doing some smaller ones as well to help make a more overgrown woodland-ish look. The new and improved foliage of course meant I needed to redo my bushes, so the hillfort and other bits of undergrowth have been redone to match the thickets, again, photos don't really do it justice... but as I said, more bits are in progress as I've run out of Burnt Umber.


 as the trees were to big to really get in the light tent, the board came out, which then dovetailed into a request someone on Frothers made to see it all, so above is the woodland in progress, with stone circle and hillfort, and below is the coaching inn, the blacksmiths and the two houses...


this has been surprising useful in that it fills the area better than I had thought - I have two more 2-storey houses to build which should about do it, along with some little bits for flavour (a well and some mud/dirt roads/townsquare), plus of course I still want to do a church and graveyard as a 3rd option (none of which yet exists). Also unseen is the river side which would roughly fill the bottom corner area above, and numerous hedges I built ages back when I was working to fill a larger area, plus some drystone walls from Fenris Games.

I know I plod along at this and am easily distracted, but am quite chuffed looking at it how good it's coming together... even if I do say so myself.

Sunday 23 March 2014

gatehouse WIP 2 - gates

 gates for the gatehouse, scratchbuilt using the Tudor Wall Panelling from Fenris, they still need hinges fitting, but are pretty much done... as I was at it I did a 2nd left side gate with a wicket door just for variety - I say left side, but the design means I can flip them around and mix it up (the wicket door just opens inwards on the left side), so I can have the peephole and plain door, peephole and wicket gate, plain and wicket gate, and so on...


the wicket gate door itself does need a bit more work - this is my 3rd attempt, just doesn't seem to work right... hey ho...

Wednesday 26 February 2014

gatehouse WIP

a bit of a build for February... a gatehouse to go alongside the manor house to help vary it up a bit and as a start to a coaching inn type courtyard... I had hoped to be further along with this one, but a bug swept the office and I've been playing alot of Fallout: New Vegas...

anyhoo, the side piece is designed to slot on over the chimney at the end of the manor house like so:


it's a bit more fanciful than the main house, but I've tried to give it a bit of character to match the vague idea of phases of build (with the manor house having a newer wing attached to an older converted hall), so they've used the remains of an old watch tower and added a timber frame on top - once the timbering is done, there should be sense of stone work trimmed and patched to fit the frame in places... in time, with additional pieces I can have a decent coaching inn yard with stables and maybe even a fortified manor house, depending on bits made and used...


I'd toyed with several uses for the new building, but space restricted any stairway, so I had to use a ladder which changed it a little bit in my mind... so I could still make the most of the thinner room over the gate, I figured a loft door would look nice enough and the whole top floor can be just used as storage, which will make furnishing easy, with maybe a merchants desk on the raised ground floor.
 

the front has an overhang on the older stone base, figuring if you could get a little more floor space you would... as I said, a little more fantasy perhaps, but I'm quite happy with it so far...

Friday 31 January 2014

the Gabriel Hounds

Some supernatural beasties that have been planned for a while, but I needed the right canine body. Gabriel Hounds (also called Gabble Hounds for the noise they make as they fly across the sky - which was probably just geese) are said to be born by the death of unbaptised children and have the heads of humans. The heads in this case are from the werewolf head sprues from Maxmini, the wolf body is from MiniatureMojo's Scavenge Skirmish Survive range - they have 3 different types available, but I prefered the hunched pose.


Not my best paint jobs, I hate doing fur as it never allows me to blend like I normally do, plus I wasn't happy with the white (definitely need to buy the very intriguing White set from Andrea Color). And they had to be white according to legend, with red ears - I had planned on blending the ears in to the white, but the fur around the heads put paid to that.

If I ever get the chance to do an Akula and get my own mini's made up, these are the first things I'll have made...

At The Muppets of Madness

A thought popped into my head as I was painting this Faceless Horror from Reaper and it kind of ruined it all for me... what should be a writhing mass of teeth, eyes and pseudopods suddenly took on the air of a singing Muppet... I think it's the teeth...


so many singing mouths... mind you, in true Lovecraftian style, painting it will drive you mad as you keep finding one more sodding eye.

a quick rebasing


ok, that was Christmas out of the way, and I struggled a wee bit to get back into the swing, but to start with a quick rebase for an old figure that was for a planned Slaine type affair, but will equally do muster for the Folk Horror stuff... a crone for the maiden Angel Blake...