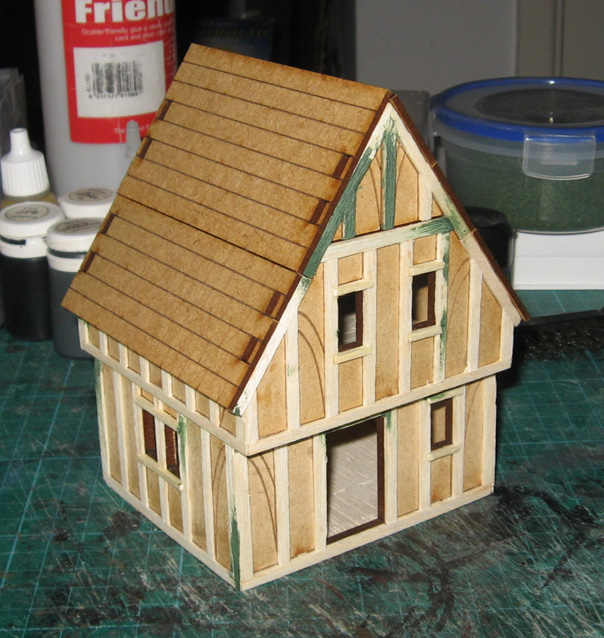
progress on the lasercut cottage kit... it hasn't actually taken me 10 days to get to this stage, I'm just a very occassional worker at the moment...

balsa wood has been added to follow the frames cut into the mdf... I still need to do the curved braces and the undereave timbers, but the majority is done and I wanted to get an update sorted out... annoyingly I bought a shedload of 2mm balsa a while ago and so went with that for the timber, but it was too thick so when it was on, the whole face was sanded back to a rough and varied 1mm... the slight differences add to the feel I think, although some horrendous over pressure (mainly on the gables) meant g/s had to rebuild the timber in a few spots - I have to say Silent Invader's work over on LAF and his own
blog are very handy references for this kind of work... also I'm becoming a huge fan of GW Liquid Greenstuff, when dry it's hard, but is just soft enough to allow a wire brush to add some woodgrain...

I gave the whole balsa frame a good going over with the wirebrush to get some more grain into the sanded flat surface, varying direction with the length of the timber... windowsills were added with matchsticks, cut into the existing balsa frames, but standing proud of the frame itself..

the basic kit didn't come with the floorboards cut in as I said before and this is something of a blessing as the mdf surface is too smooth to get a wood effect with and when 'roughed' up just gets down to the fibrous mess inside which is no better... I bought the thinnest balsa I could find and glued that to the interior floors and scored in the floorboards - each is 5mm wide which may seem wide in the grand scheme of things, but gives me 17 boards across, when the lasercut version has 16 across... I also cut the hatch over to one corner (from the look of the instruction diagram, on the bought kit that is in the middle of the floor), it's 2cm square, wide enough for the ladder and a 28mm body, leaving the majority of the floor clear - what I loved about this kit is the access to the inside and I want to make the most of it... I added a frame around the hatch into the balsa, with a little help from more liquid g/s...

same with the downstairs floor really, although no hatch... the ladder will be attached to the downstairs wall once it's prepped and I have a rather nice fireplace made up - it just didn't photograph well... I need to do the matching breast upstairs, but it will be on a small footprint so I don't lose any floor... the one difference with this floor was that I needed the balsa to be flush with the bottom of the doorframe, so the walls are all raised slightly by the same thickness of balsa, this is hidden by the framing timbers though, but just thought I mention it if anyone is following in these footsteps...

and a shot for scale... poor photos I know, but they do the job... I need to add the curved timbers on the frame, the chimney breast on the first floor and decide what to do about the roof before adding the chimney stack itself... that will probably be made from blue insulation foam rather than using the mdf one in the kit... similarly to the floorboard problem, the door from the accessories kit is going to be too smooth, so I need to think on that... I still think that kit is a good deal, the windows alone make it, and the lovely little tudor door frame detail as well... I'll keep you posted on that...

 annoyingly, what stalled me was what colours to paint them - I'm fine with uniforms and Timelords and what have you, but as soon as I need to decide on a colour, I really do ponder too much... in the end I just picked out the earthy tones from paints, and slapped it on... so it's kind of a slap dash job to an extent as I didn't want to be thinking about the colours too much... it kind of worked - a nice surprise was the WW2 German Uniform green... will use that more for this project I think...
 next were four Mantic ghouls that were heavily g/s'd for the 17th century vibe... quite chuffed with the frilly shirt on the red chap...
 finally, a mix and match with Mantic bits added to Warlord plastic ECW figures... the female ghoul is converted from a Redoubt Enterprises ECW villager (with buckets on a yoke thing)...




 the fire was made from blue insulation foam, two pins, splintered matchsticks and superglue... the flaw there involved the hole from the pin leading to unprotected foam which promptly melted and collapsed when the superglue found it's way down there... g/s replaced that bit, sadly it looked better beforehand, but it will do...

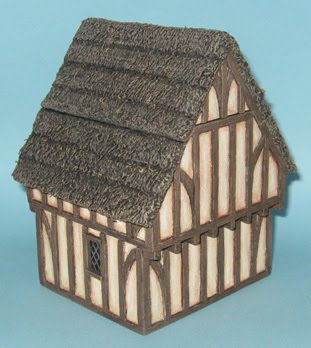
 and then to the roof... tried thatch as I couldn't face cutting all those tiles... some nice tutorials can be found
  now, the sharp eyed will have noticed the absense of a chimney, Levied Troop over on Frothers pointed me towards a very useful little book...
  TAG Modern SWAT with gasmask heads from Eureka and some g/s - I did buy some of the Urban Beat SAS from North Star, but they are so skinny they looked silly next to normal 28mm figs... these will be doing duty as special forces back up obviously...
 a Rogue miniatures not-DieHard terrorist with new feet, soon to get some new hands and when I get my head order a new head... undecided which one, may be the Man from 2000...