Sunday 8 September 2024

Market Hall WIP 1


Some pimping begins… managed to track down a 4ground market hall at a similar price to when it was in production, so it needs to be brought up to match my other 4ground stuff… interiors textured and a little balsa for the door and window lintels for a bit of depth. Need a lot of balsa to start the timbers externally so just tarted the door to the cell.

Other pics of my older 4ground buildings can be found here, here and here

Would be nice if some picked them up to continue the line…

Sunday 25 August 2024

Lord Summerisle’s ghillie…

 Not overly happy with the paint job, didn’t want him in uniform, figured some earthier colours would work, but couldn’t get a brown tweedy look, so went with blue. The tartan is made up, because they all are, but again with more countryside autumnal shades.


A bit satiny, but it’s been damp here so had to use brush on varnish. May redo the jacket.

Mind The Oranges Marlon!

 Yep… I bought some trees from Temu. They were utter poo of course, but some may be useable with some pimping.

These are orange trees. The original flock is awful, so I just reflocked them with my own blend while avoiding the oranges which were on the whole very securely attached.

Bit of paint on the trunk and based. For the pence add on to the order from China, bargain. Perfect set dressing for the Peninsular.


I have no idea how big orange trees are, but they’ll do…


Wagon Wheels… and the Wagons

I was casually searching for useful bits for the Silver Bayonet and found that Warbases do a Napoleonic Wagon pack for Sharp Practice, which includes a carriage, an engineers wagon, a water wagon and an ammunition wagon. All MDF with some card as that’s their bag, but with some resin bits for the water wagon and engineers wagon. 

This is the carriage, apparently it’s a Clarence carriage which is from the 1820’s, but looks close enough for my liking. 


It was a little tricky, but I think it would be worth doing another having learnt lessons. I used some corrugated card to fill the windows and save doing the interior, hey presto curtains for added mystery. The kit has holes for carriage lamps, but didn’t come with lamps, so I cobbled together some from plasticard.

Yellow seemed apt and lashings of mud to hide the MDFness of the kit.


I’m happy with it and might do another down the line. I have some horses for it, but want to find some dead ones as well.

The engineers wagon is just MDF, with a resin cargo load. Very straight forward build. Nothing exciting, I kept the load separate to vary stuff up a bit. And more mud.


The water wagon is a bit poo unfortunately. The resin barrel isn’t great, the build is meh, the axles broke while building due to the nesting cut being too snug. I built it and didn’t bother after. I’ve not attempted the ammunition wagon, but will. I will get another carriage and engineers wagon at some point.

Warbases also do some carriage horses and draft horses with appropriate tack which I have and will need to get round to when I have some dead ‘uns. They also do a pair of Napoleonic drivers, but the carriage is the only one with a seat and they don’t fit on it, so not sure what they’re for. The horses are good, but skip the drivers if tempted.


Monday 29 July 2024

3D printed ruins

So, the end of last month was my birthday and I got a load of Amazon vouchers. Aside from the inevitable DVDs or books, although never my preferred gaming store, it’s sometimes worth a look. I’ve had some 3D printed barricades from Amazon before - painted for my stalled MC-1 project (not sure if I’ve ever shared them anywhere), but they’re decent for the price, as are these ruins which easily fill a gap in my terrain options.


Are they perfect? No. Could I make my own? Maybe, but I’m not replicating those pillars and arches over and over again. So these are decent. Layer lines are an issue close up, but they will look fine on the tabletop.


This large single piece is one set, the puddle base adds a bit of rubble, but the layer lines are a bit more obvious when you’re looking at higgledy piggledy blocks. So that was pimped with some texture paste initially and then with some Grimdark scatter from Krautcover (via Bad Squiddo). I used the dead static grass I’d used on the marshland to give a decayed “all is not well here” feel…


The vines were added to hide a frankly lazy bit of 3D sculpting present here and in one of the other pieces I got, where two elements form the corner and the arches bleed into each other. If QP3D should ever read this, you really should clean that up. You manage it on the T and X walls, but not on the L shaped walls.


So, the second set was a set of four, a straight and the aforementioned X, T and L walls. These are the same to all intents and purposes. Aside from the bleeding arch, the only real flaw is the straight isn’t very stable and the joy for me of these was the minimal basing. One nudge of the table and that will topple, so I added my own puddle base, tried to replicate the one on the large L and it’s nice and sturdy now.


As said before, the L has that bleed, so vines again.


And completely absent from the T and X.


And finally, a look at the tops. The sculpts had a kind of broken  mortar effect, which is a little visible in places, but the tops got hit with Grimdark cover and the dead grass. Quite happy with the final pieces.


As I said, available from Amazon or their own website (https://qp3dwargames.co.uk/) where these appear to be part of a nice pseudo Osgiliath range.

Sunday 21 July 2024

Some plastic WIP

 A bit of plastic jiggery pokery from the weekend. Inspired by a post on the Facebook Silver Bayonet page, a native scout option, in this case Lord Summerisle’s ghillie.


I also picked up Here’s The Ruckus that was free with Wargames Illustrated a few months back, so figured I’d build the remaining minis from the Perry sprue that contributed the Living Armour.

Sunday 23 June 2024

Wetland

Some wetlands terrain bits. These have taken a long long time to finish. 

This was my test piece using plasticard scraps, tufts, static grass and UV resin. The key unknown was how the resin would react to grass. It’s kind of lumpy, but also could get drawn up the grass/tufts which was something I’d need to avoid.

But first I had to build them. I decided to use 2mm foampvc for the raised bits, which would give a deeper pour (2mm less some for texture and grass). The edges were wide so I could try for a gradual slope and the base was 0.5mm plasticard. This was a mistake (see later).

They were textured and grass added. I used winter/dead static grass to give a decayed tone, but gradually added some of my usual spring and added these to the edges, subsequently adding more spring towards the edge. Tufts were dead shade from WWS. although these were later replaced with winter and autumn from Geek Gaming Scenics. The WWS ones were just too regularly shaped it didn’t look natural.

The pours took an age. Some of the areas were too wide with hindsight and would take a full day on the window sill to set completely - I have a UV light, which sets it, but finger prints are a hazard, so direct sunlight was required. And the heat reaction of the resin setting warped the plasticard. Bugger.

Mistakes were made, so when the resin was done I needed to bend the boards back and sand down the heat sag a bit. I also needed to grass again. This hid dodgy pours, blemishes and allowed a more ragged uneven ‘shoreline’ than the original's cut out foampvc bits. Glue was painted on the resin in wiggly lines for mid water tufts and the new tufts were added. Some small flock bushes were also added. I also added something I’d forgotten to add, a sunken barrel and some logs. I also added some more resin on the banks for shallower areas, as they didn’t look boggy enough for me. I smoothed these out as best I could before more waiting for the resin. These then needed grass to redo the ragged bank look. So much waiting. But they look ok. I’d do some things differently if I was to redo them, but these will do.

This pic is the old tufts:

And  the new again for comparison:

Saturday 15 June 2024

Dirt roads…

 So, April and May kind of got away from me. I’ve been doing bits, but not finished anything. I should have posted WIPs I suppose. Conquistadors and wetland to appear at a future date…

Anyhoo, one of the things was some thin rubber roads from eBay. I got a set of junctions/curves and a set of 3x straights. I decided I’d go for another set of straights just to be on the safe side, but the vendor was ill and I had to wait. I planned on stripping back their flock and repaint/reflock to match my stuff, and to ensure consistency, had to wait for the second set to arrive. Once here I brushed off as much of their flock as I could and gave it a quick base coat and drybrush. The wheel ruts got some Mortarion Grime as that gave a more dirty water/mud feel to those. I entertained resin, bought thought better of it. One of the second set of roads wasn’t as nice a finish, didn’t bother me really, chap had been ill and 5x straights would be enough so cut off the less finished bit and have a short straight if needed. My standard spring flock and some tufts and flowers and job done.

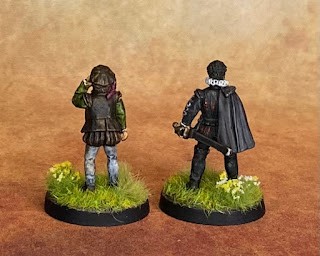
So, some simple dirt roads, reasonably price on eBay and pimped easily enough. Lord Summerisle and changeling for scale.


Saturday 30 March 2024

More Renaissance types

 Three more Renaissance types. The first two are from Antediluvian Miniatures and the last one from The Assault Group. I tried to follow the painted examples by Antediluvian and the learned chaps wear black vibe just extended to Machiavelli (if memory serves)…


Sunday 25 February 2024

the Da Vinci tank…

 I realised I’d not taken pictures of the Da Vinci tank since I’d finished it, so as Leonardo was out…